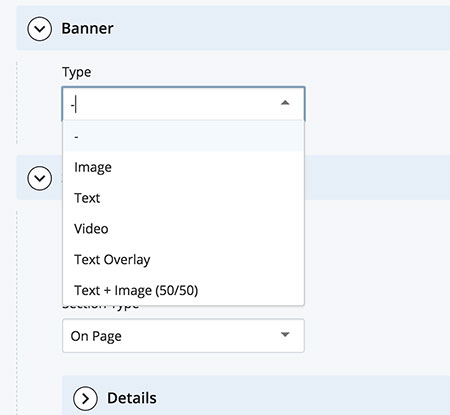
This update to the framework includes the new banner options of Video, Text Overlay, and Text + Image (50/50). The update also includes new image sizes for Image banners. To learn more about banner options and for information on using the new banners, see the banner documentation.
Step 1:
In the Administration area of your site, locate the data definition for Page - Standard.
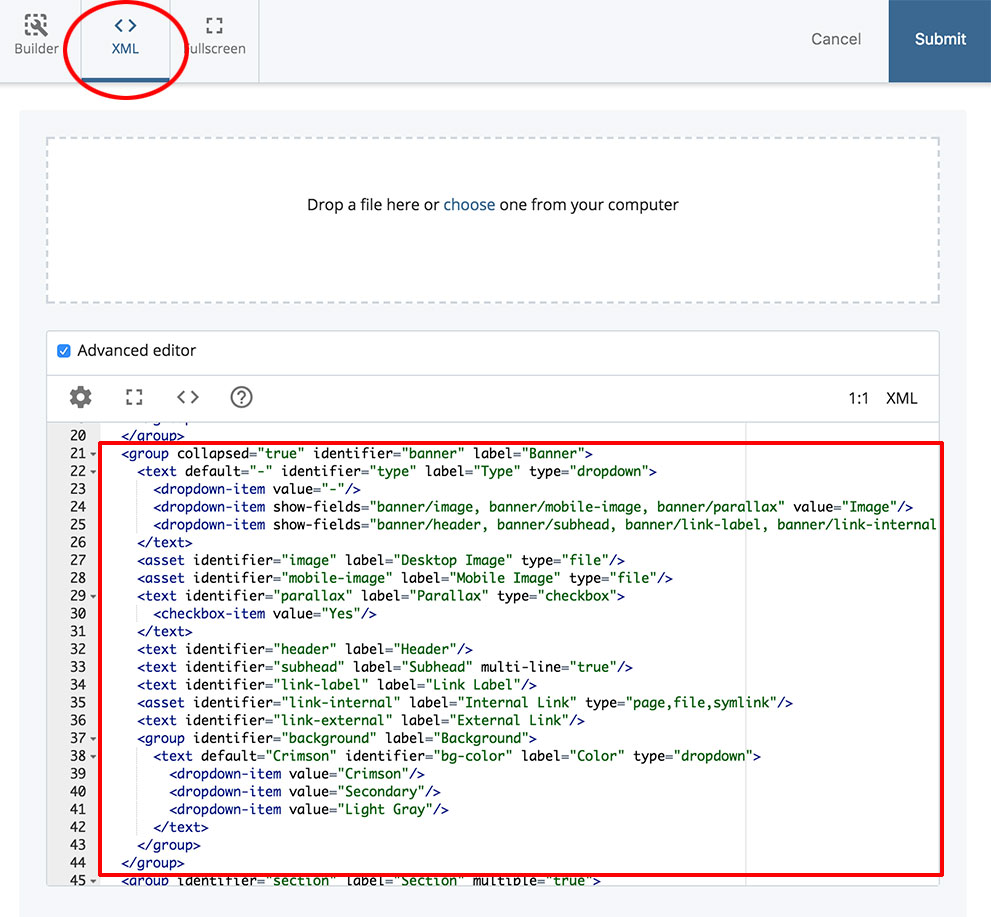
Edit the data definition in XML.
Locate the XML for the banner.

Step 2:
Replace the banner XML with the following XML:
    <group collapsed="true" identifier="banner" label="Banner">
        <text default="-" identifier="type" label="Type" type="dropdown">
            <dropdown-item value="-"/>
            <dropdown-item show-fields="banner/image, banner/tablet-image, banner/mobile-image" value="Image"/>
            <dropdown-item show-fields="banner/header, banner/subhead, banner/link-label, banner/link-internal, banner/link-external, banner/background" value="Text"/>
            <dropdown-item show-fields="banner/mp4, banner/webm, banner/fallback-image, banner/mobile-image, banner/transcript" value="Video"/>
            <dropdown-item show-fields="banner/content-position, banner/image, banner/tablet-image, banner/mobile-image, banner/header, banner/subhead, banner/link-label, banner/link-internal, banner/link-external" value="Text Overlay"/>
            <dropdown-item show-fields="banner/image, banner/tablet-image, banner/mobile-image, banner/content-position, banner/header, banner/subhead, banner/link-label, banner/link-internal, banner/link-external, banner/background" value="Text + Image (50/50)"/>
        </text>
        <asset identifier="image" label="Desktop Image" type="file"/>
        <asset identifier="tablet-image" label="Tablet Image" type="file"/>
        <asset identifier="mobile-image" label="Mobile Image" type="file"/>
        <asset identifier="mp4" label="MP4" type="file"/>
        <asset identifier="webm" label="WebM" type="file"/>
        <asset identifier="fallback-image" label="Fallback Image" type="file"/>
        <text identifier="transcript" label="Transcript" wysiwyg="true"/>
        <text default="Left" identifier="content-position" label="Content position" type="radiobutton">
            <radio-item value="Left"/>
            <radio-item value="Right"/>
        </text>
        <text identifier="header" label="Header"/>
        <text identifier="subhead" label="Subhead" multi-line="true"/>
        <text identifier="link-label" label="Link Label"/>
        <asset identifier="link-internal" label="Internal Link" type="page,file,symlink"/>
        <text identifier="link-external" label="External Link"/>
        <group identifier="background" label="Background">
            <text default="Crimson" identifier="bg-color" label="Color" type="dropdown">
                <dropdown-item value="Crimson"/>
                <dropdown-item value="Secondary"/>
                <dropdown-item value="Light Gray"/>
            </text>
        </group>
    </group>
Step 3:
Click Submit to save your changes.
Step 4:
To confirm the field has been added, when viewing the Page - Standard data definition, check the Apply Smart Field rules box at the top left. Expand the Banner section. The new options should appear.

Step 5:
To update banner options on all page types, the data definitions for Page - Event, Page - News, and Page - Profile will also need to be updated following Steps 1-4.

